Auto deploy Laravel sử dụng docker lên AWS ECS

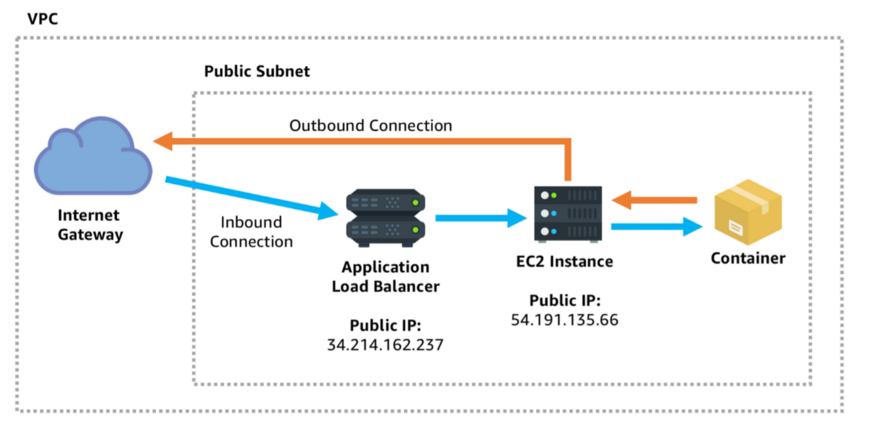
Tr0ng bài viết này mình sẽ hướng dẫn mọi người cách để deploy 1 dự án laravel sử dụng docker lên AWS ECS với launch type là EC2.
Đầu tiền để deploy 1 ứng dụng laravel đơn giản chúng ta sẽ cần chuẩn bị:
- Docker images (Nginx, app, Mysql)
- ECS cluster
- ECS Task Definition
- ECS Service
- Elastic Container Repository
- Tạo 1 Cluster với type là EC2 Linux + Networking. Sau đó chọn instance type bạn muốn (ở đây mình chọn t2.micro) và số lượng instances để chạy cluster (mình chọn 1)


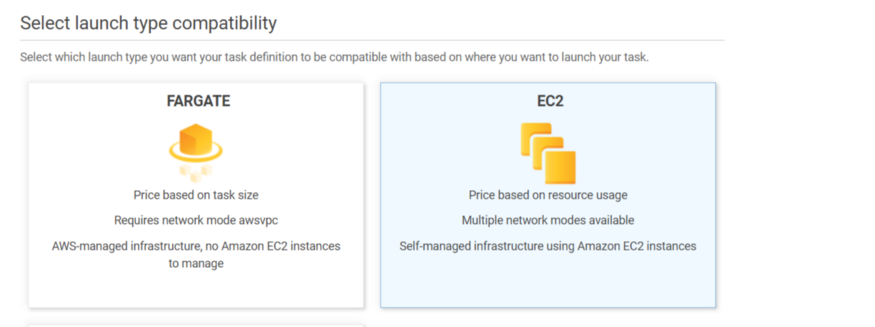
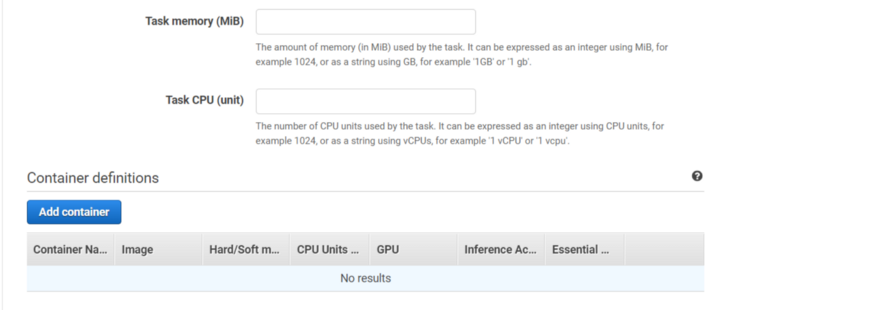
2. Tạo Task definition - Đây đơn giản là 1 configure file sẽ được chạy bởi ECS. Chọn type là EC2. Thêm container ( ở đây mình thêm nginx (web) và app server images)

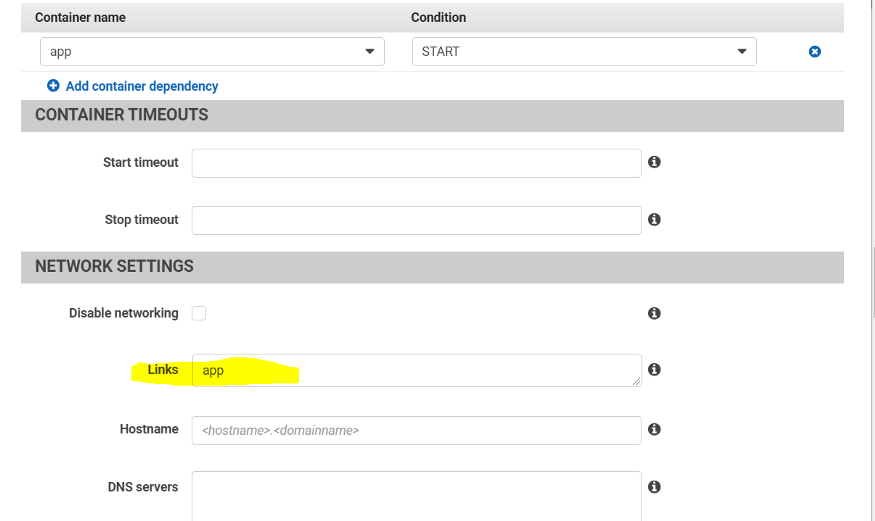
Bên dưới là Nginx (webserver) depends on app server. Vì vậy chúng ta cần tạo 1 dependency link giữa 2 container. Để làm điều đó hãy click vào Nginx, phần startup dependency ordering chọn container name là app và condition là START, bởi vì app container nên chạy trước web container.

Trong network settings của Nginx container, chúng ta cần thêm network settings để 2 container có thể giao tiếp với nhau.
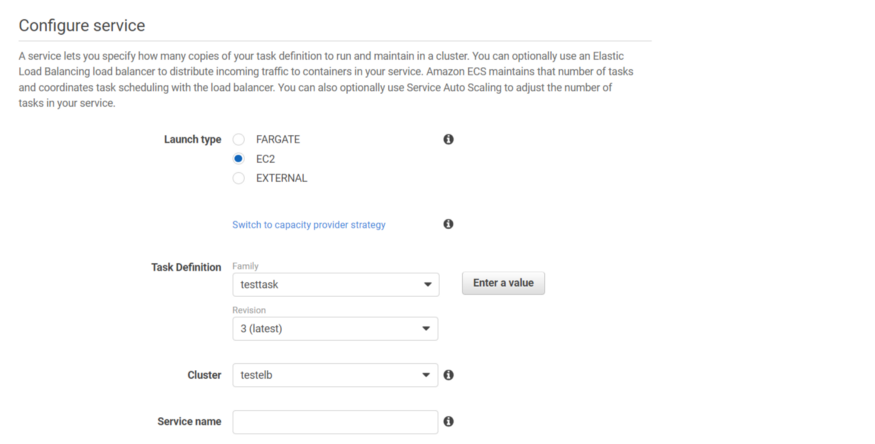
3. Tạo Service trong cluster với type là EC2 và đính Task definition.
4. Giờ chúng ta đẩy images lên ECR thông qua GHA CICD. Ở bước này chúng ta chỉ cần push hoặc merge code vào branch được định nghĩa trong thư mục .github/workflows.

Sau khi đẩy images lên ECR, GHA sẽ truy xuất task definition và cập nhậtiamges trong tệp đó và cập nhật service và cluster.
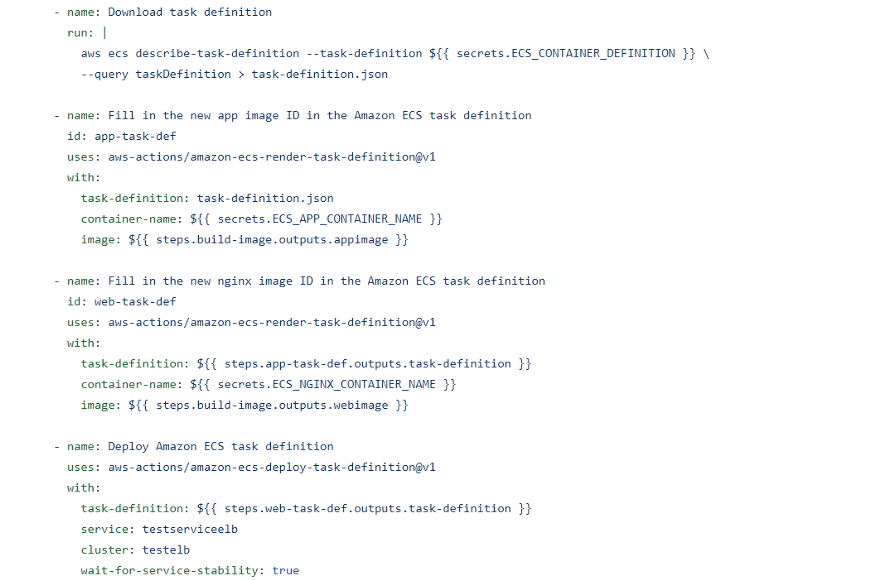
File deploy.yml với nội dung đầy đủ được đặt trong thư mục .github/workflows
# This is a basic workflow to help you get started with Actions

name: CI

# Controls when the workflow will run
on:
  # Triggers the workflow on push or pull request events but only for the master branch
  push:
    branches: [ master ]
  pull_request:
    branches: [ master ]

  # Allows you to run this workflow manually from the Actions tab
  workflow_dispatch:

# A workflow run is made up of one or more jobs that can run sequentially or in parallel
jobs:
  # This workflow contains a single job called "build"
  build:
    # The type of runner that the job will run on
    runs-on: ubuntu-latest

    # Steps represent a sequence of tasks that will be executed as part of the job
    steps:
      # Checks-out your repository under $GITHUB_WORKSPACE, so your job can access it
      - uses: actions/checkout@v2

      # Runs a single command using the runners shell
      - name: Run a one-line script
        run: echo Hello, world!

      # Runs a set of commands using the runners shell
      - name: Run a multi-line script
        run: |
          echo Add other actions to build,
          echo test, and deploy your project.

      - name: Directory Permissions
        run: chmod -R 777 ./

      - name: Configure AWS credentials
        uses: aws-actions/configure-aws-credentials@v1
        with:
          aws-access-key-id: ${{ secrets.AWS_ACCESS_KEY_ID }}
          aws-secret-access-key: ${{ secrets.AWS_SECRET_ACCESS_KEY }}
          aws-region: us-east-1

      - name: Login to Amazon ECR
        id: login-ecr
        uses: aws-actions/amazon-ecr-login@v1

      - name: Build, tag, and push image to Amazon ECR
        id: build-image
        env:
          ECR_REGISTRY: ${{ steps.login-ecr.outputs.registry }}
          ECR_REPOSITORY: reponame
          IMAGE_TAG: latest
        run: |
          docker-compose build
          docker tag larvel-nginx:latest $ECR_REGISTRY/larvel-nginx:$IMAGE_TAG
          docker tag larvel-app:latest $ECR_REGISTRY/larvel-app:$IMAGE_TAG
          docker push $ECR_REGISTRY/larvel-nginx:$IMAGE_TAG
          docker push $ECR_REGISTRY/larvel-app:$IMAGE_TAG
          echo "setting output values"
          echo "::set-output name=appimage::$ECR_REGISTRY/larvel-app:$IMAGE_TAG"
          echo "::set-output name=webimage::$ECR_REGISTRY/larvel-nginx:$IMAGE_TAG"
      # Runs a single command using the runners shell
      - name: Print the image name
        run: |
          echo the images are
          echo ${{ steps.build-image.outputs.appimage }}
          echo ${{ steps.build-image.outputs.webimage }}
      - name: Download task definition
        run: |
          aws ecs describe-task-definition --task-definition ${{ secrets.ECS_CONTAINER_DEFINITION }} \
          --query taskDefinition > task-definition.json
      - name: Fill in the new app image ID in the Amazon ECS task definition
        id: app-task-def
        uses: aws-actions/amazon-ecs-render-task-definition@v1
        with:
          task-definition: task-definition.json
          container-name: ${{ secrets.ECS_APP_CONTAINER_NAME }}
          image: ${{ steps.build-image.outputs.appimage }}

      - name: Fill in the new nginx image ID in the Amazon ECS task definition
        id: web-task-def
        uses: aws-actions/amazon-ecs-render-task-definition@v1
        with:
          task-definition: ${{ steps.app-task-def.outputs.task-definition }}
          container-name: ${{ secrets.ECS_NGINX_CONTAINER_NAME }}
          image: ${{ steps.build-image.outputs.webimage }}

      - name: Deploy Amazon ECS task definition
        uses: aws-actions/amazon-ecs-deploy-task-definition@v1
        with:
          task-definition: ${{ steps.web-task-def.outputs.task-definition }}
          service: testserviceelb
          cluster: testelb
          wait-for-service-stability: true
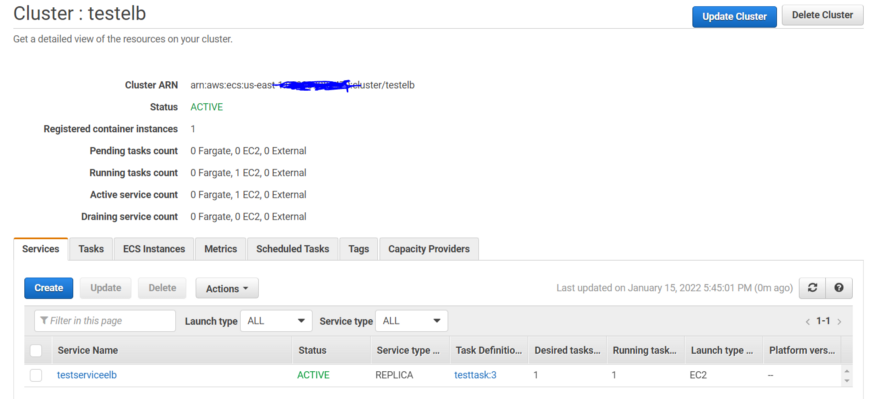

Vậy là bạn đã deploy thành công 1 ứng dụng Laravel chạy bằng docker lên Amazon ECS.
Tài liệu tham khảo
bài viết trên được tham khảo từ link